Author’s Note
This procedure is best attempted while watching a Futurama episode such as Parasites Lost.
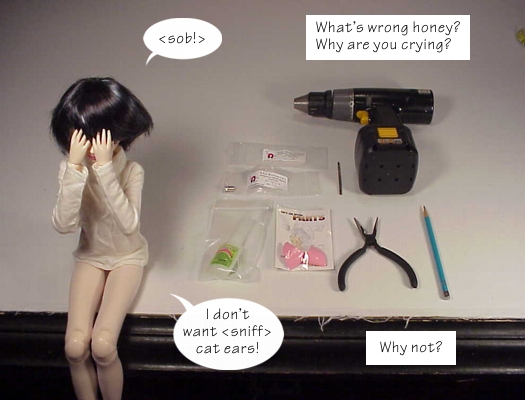
List of Materials
A willing victim
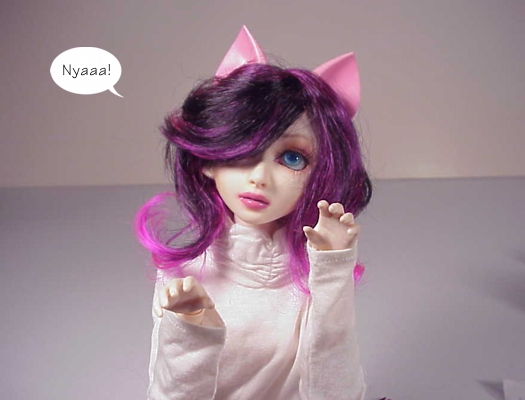
The appendage (in this case, cat ears, Unoa type 1)
Super glue (preferably the thicker, gap-filling kind)
The magnets
I used two sizes (available from kjmagnetics.com) 1/8” x 1/16” (item #D21SH) for installation in the ears and larger 5/16” x 1/8” (item #D52) for inside the head. Get about 10 or 12 of each type. They’re really cheap and we’ll be using a few extras as tools. You’ll figure out things to do with the extras.
A measuring device
A small awl (or other device for scoring a small hole)
A 1/8” drill bit (the same diameter as the magnets to be installed in the ears) and drill (optional)
A pencil
Needle nose pliers (for retrieving small parts inside those small head cavities
Paper towels (to wipe up excess glue)
(Excuse me a minute)

Here's a cut away diagram showing how the parts will lay out once everything is assembled.
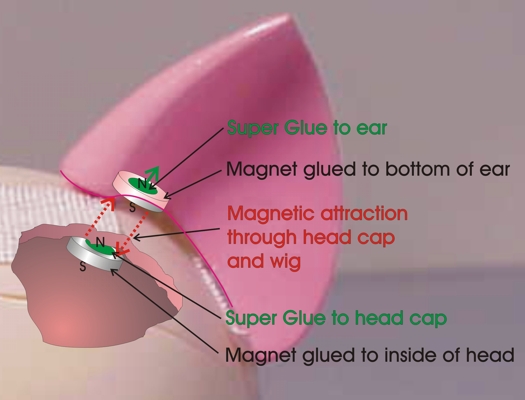
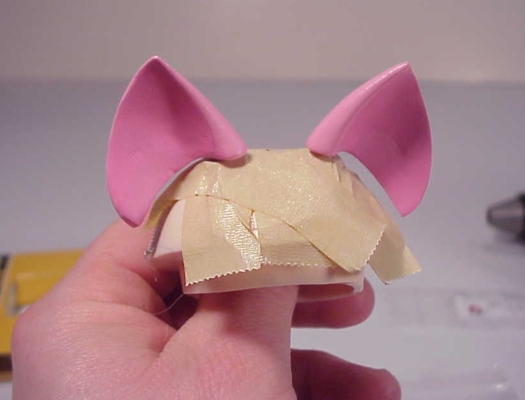
As this tutorial is being done after the last ear installation I performed, I have already installed the magnets in the ear parts but the procedure goes like this.
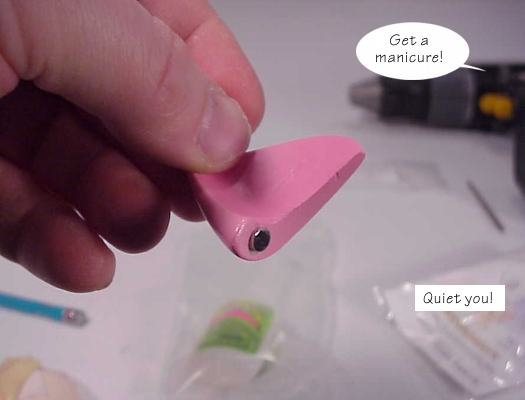
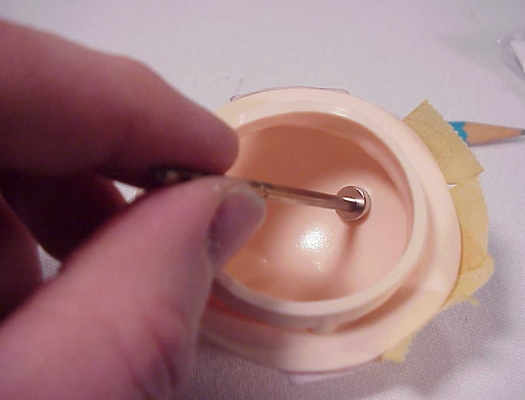
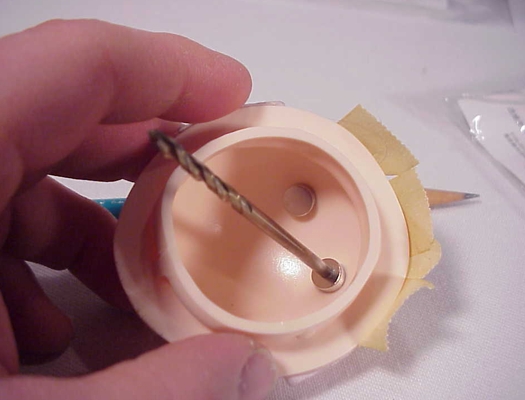
The Unoa cat ears were prepared by removing the Unoa specific mounting tab. The curve on the bottom of the ears is enough that is does not need to be modified for this installation on the Haruka head. Measure the ear at the widest part of the bottom, where it will sit on the head. The Unoa ears are wide enough to support a 1/8” diameter magnet comfortably. In this wide part of the ear, drill a hole slightly less than the height of the magnet, in this case, about 1/16”. You can use the drill if you’re comfortable with it or you can just twist the drill bit between your fingers. To start the hole, take your awl (or other sharp metal object, it could be a pin, a small nail, a center punch, a scribe) to poke a small mark in the center of where your drill hole is to be. This little indentation will help keep the drill bit from “walking”. Check the depth of the hole frequently by sticking in a small object (like your pencil point) and measuring the depth.
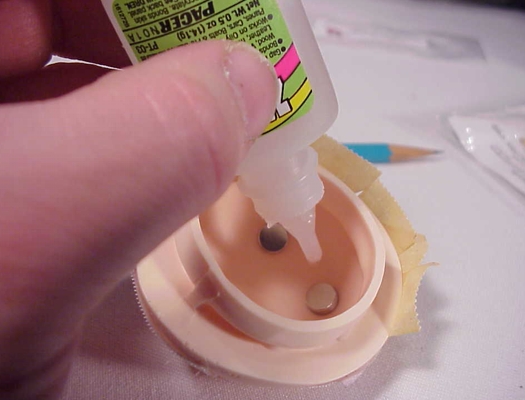
Once the holes are the correct depth, you are ready to install the magnets in the ears. The little cylindrical magnets have their poles on the flat faces of the disk and will come in a little stack. Because of their North/South polarity they will only adhere to one another one way. Play around with them a little, you’ll see what I mean. We are going to use this property to our advantage.
Leave the little magnets in a stack. Place a drop of super glue in the hole and press the end magnet into the hole using the stack of magnets as a handle. Once the bottom magnet of the stack is about half way in, use your fingernail to pry it from the rest of the stack. Sliding the stack off sideways will help. Then push the magnet in the rest of the way. Watch for excess super glue to squirt out. There is nothing worse than two magnets super glued together. Wipe off the excess quickly with a paper towel. Allow to dry. The thicker varieties of super glues usually have longer set up and dry times.
Don’t worry if the magnet does not go in flush with the bottom of the ear. If they stick out a bit it’s probably better. The wig and hair will mask any little gap between the ear and head.
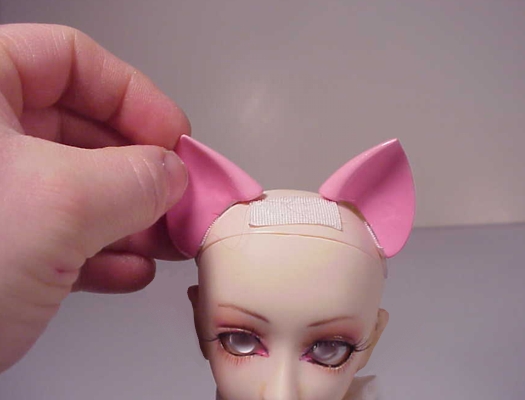
Once the glue has dried, locate the ears on the head. Different placement can give you different looks. Ears mounted towards the top and front of the head look more alert. Ears mounted wider and to the side and back look more relaxed. See what you like.
Next we are going to tape two of the spare magnets to the outside of the head cap. By using their magnetic attraction, these magnets will aid in the placement of the magnets mounted permanently inside the head cap. These taped on magnets will be removed once the permanent magnets are glued in securely.
Once you have decided on placement, mark the location of the ear magnet on the head with your pencil. Remove the ears and double check you marks for symmetry, side to side and front to back, unless asymmetry is what you’re looking for.
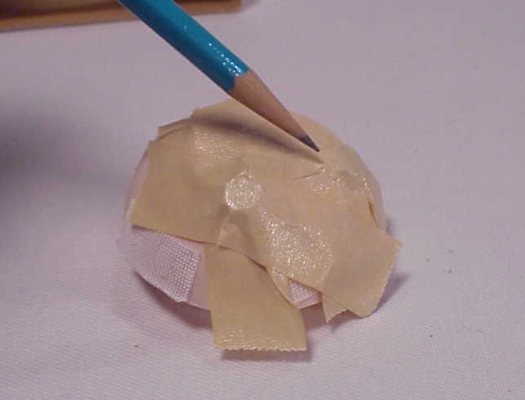
Next, tape two of your large magnets on the head, centered over your marks. Use enough tape to hold these two in place, as they will want to pull towards each other. You can do the next several steps for each ear separately if you wish.
With the magnets taped to the outside of the head, take your dry cat ears and place them on the magnets to check the polarity. If the ears stick correctly, you’re good to go. If one or both of the ears jump around, you need to turn the magnet taped on the outside of the head over.
Now you’re ready to mount the internal magnets. Take one of the larger magnets and place it on the flat end of your drill bit. Slowly ease the magnet into the head towards the location of one of the taped on magnets. As you get closer you should feel a slight pull into the head (provided it doesn’t leap out of your fingers). If so, your magnets are lined up correctly. If you feel a bit of a sideways push on your drill bit/magnet, turn the magnet on the drill bit over.
With the polarity of your magnet correct, apply a small drop of super glue on the end of the magnet and put the drill bit/magnet into the head. The magnet taped on the outside will pull the magnet/drill bit into perfect alignment. Hold the magnet in place with your fingernail and carefully slide the drill bit off of it.
Allow the glue to dry and then repeat with the other interior magnet.
Once the two interior magnets are secure, it wouldn’t hurt to add a few drops of super glue around the base of each magnet to help keep them in place.
When all your glue is dry, remove the taped on magnets and pop the head cap on. Put the wig on your doll, then the ears. The interior magnets will pull the ears right into place. Your new ears can be removed easily for hair brushing and wig removal.
DISCLAIMER
This procedure has not been endorsed by any of the manufacturers of the products involved. Furthermore the Nekomimi Appreciation Society condemns all experimentation and augmentation to any and all nekos. The author takes no responsibility for any results, damages, or criminal charges stemming from any attempts to duplicate these procedures. Proceed at your own risk. Your mileage may vary.