There are a lot of pictures in this tutorial showing some of the lady parts of the Angel Philia/Real Art Projects torsos and busts, which are on the realistic side. If dolly nudity bothers you have someone less sensitive review and describe the procedure to you.
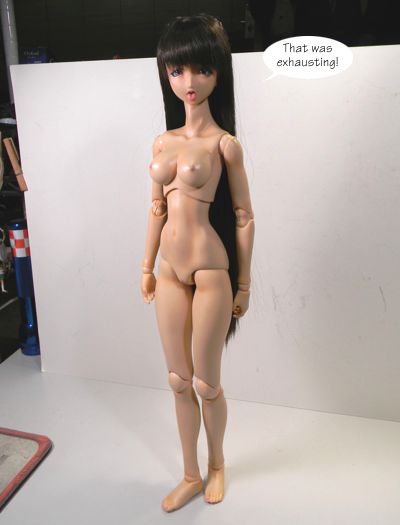
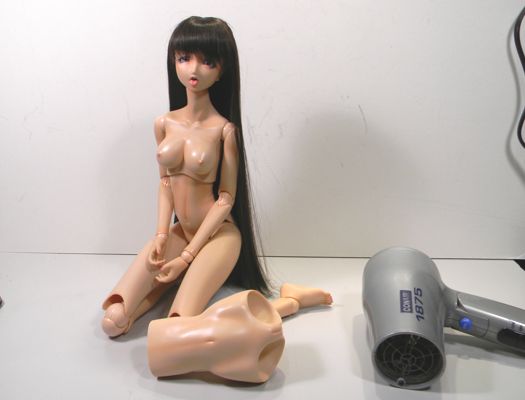
The only tool you may need is your trust hair dryer. This procedure can be performed without the hair dryer but using it can make the swap much easier to first time vinyl surgeons. In this tutorial I'm using white skin skeleton parts on this tan skin body so it's easier to see the parts when next to each other.
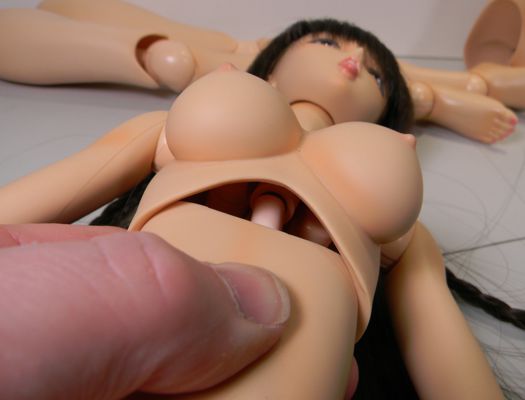
From the look on her face, Marina may know what’s in store.
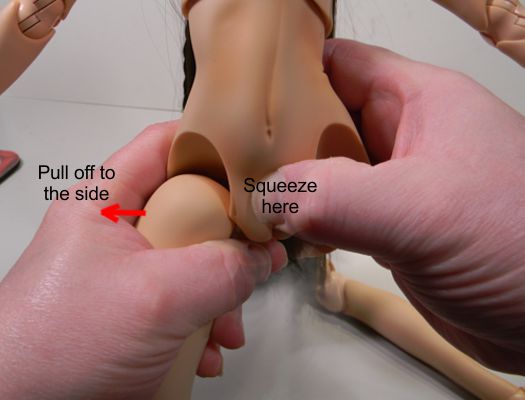
1) First you will have to remove both legs at the hips.
Grasp the leg (pick one) up close to the top. With the other hand grasp the abdomen between the legs and squeeze till you can feel the hip joint part inside the vinyl.
When working with the torso/abdomen, it is important to squeeze the soft vinyl parts to get a hold of the skeleton underneath. Holding the skeleton parts will help keep them from moving about during assembly and disassembly. You will more easily keep the parts aligned and prevent damage from trying to force parts together/apart crooked.
Swing the leg front to back while pulling directly (90 degrees) from the body.
Repeat with the other leg.
2) Removing the spine from the abdomen vinyl.
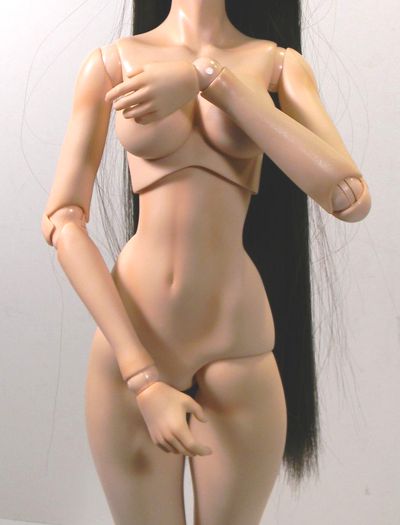
Grasp the abdomen below the bust vinyl and squeeze so you can feel the spine.
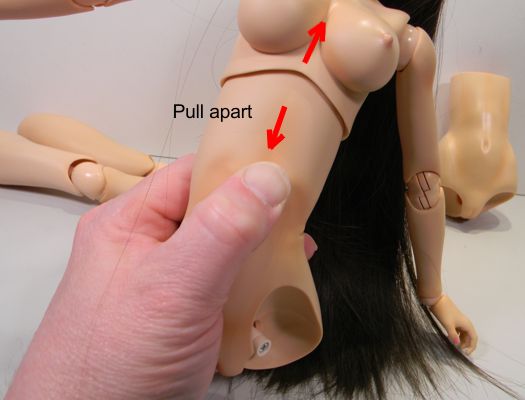
With your other hand, grasp the upper torso between the shoulders and squeeze so you can feel the center area of the chest joint. While twisting side to side, pull up to remove the upper torso.
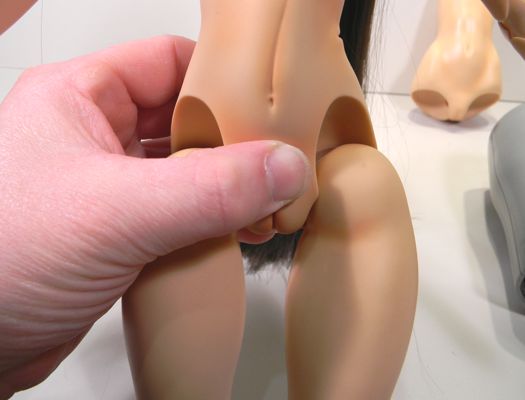
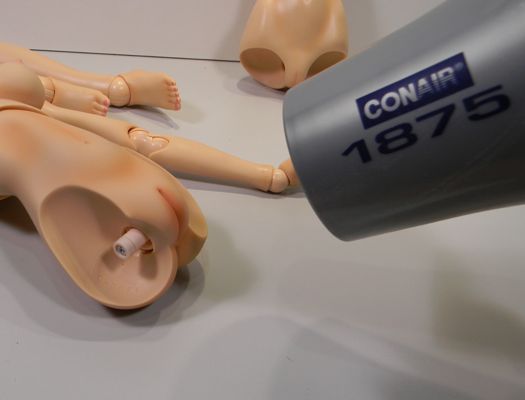
This is where you'll want to use your hair dryer. Heat up the area between and including the hip joint recesses (where the top of the legs used to be). This will soften the vinyl making it easier for you to stretch it as needed.
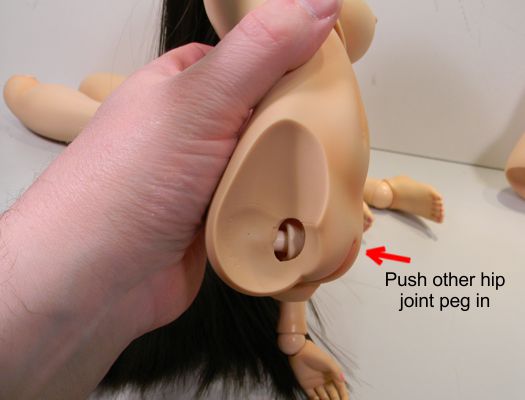
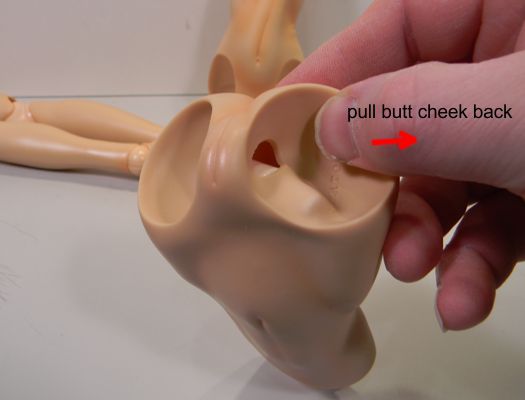
One at a time, try to push the hip joint pegs into the abdomen vinyl. It can be a bit tricky the first time you try this, but don’t worry the vinyl is stretchier than you think.
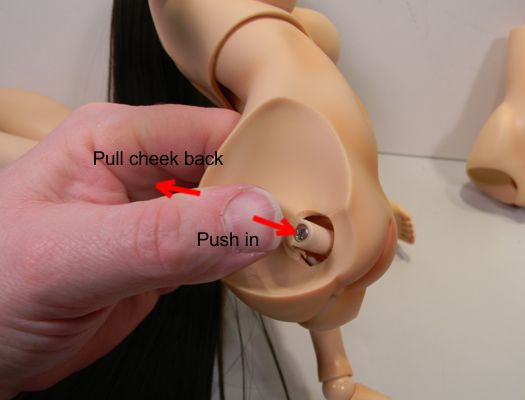
Once the first peg is in there, push on the other peg, pushing the inside peg back into the butt cheek. Finally push the second peg into the abdomen.
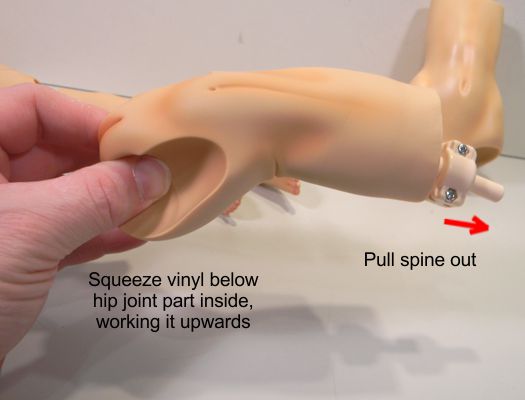
Once you have both pegs inside the abdomen vinyl, reach in the top of the abdomen and grasp the top of the spine. With your other hand, pinch the abdomen below the hip joint part (inside the vinyl) and work the entire spine and hip joint out the top of the abdomen vinyl.
Take this opportunity to straighten the spine joints.
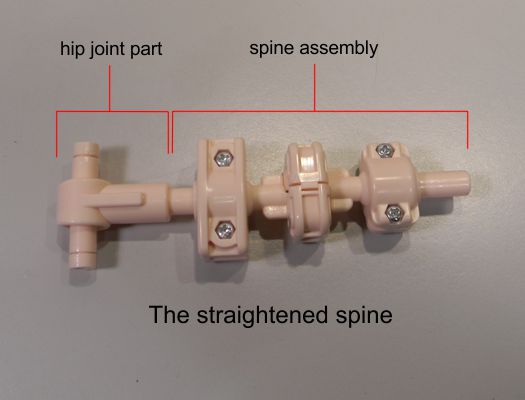
3) Insert the spine/hip joint in the new abdomen vinyl.
Before you do this step, examine the holes in the leg recesses where the hip joint pegs will come out. These holes are trimmed at the factory very close to the hip joint part.
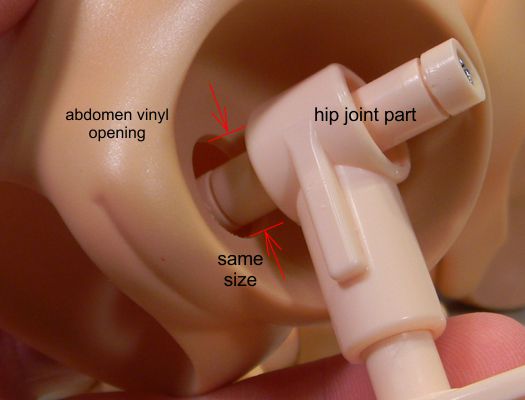
These joint parts are assembled at the factory by experienced workers who can do this hundreds of times a week. During your reassembly the edges of the vinyl can get caught between the hip joint part and the joint at the top of the leg. This will lead to future problems including "swingy" legs, "dropping" legs and broken hip joints. Now would be a good time to enlarge these holes a little bit with your hobby knife (just a millimeter or so). This will give you a bit more clearance when reinserting the legs, making future reassembly easier for us mortals. This trimming will be hidden when the leg is in place so don't worry about it being too pretty.
Okay, back to the reassembly...
Heat the bottom of the new abdomen as you did with the one you removed. Slide the spine/hip joint into the top of the abdomen vinyl. There is no real front or back to the spine assembly. It is wider side to side than it is deep, front to back. It’s really the only way it will fit in there.
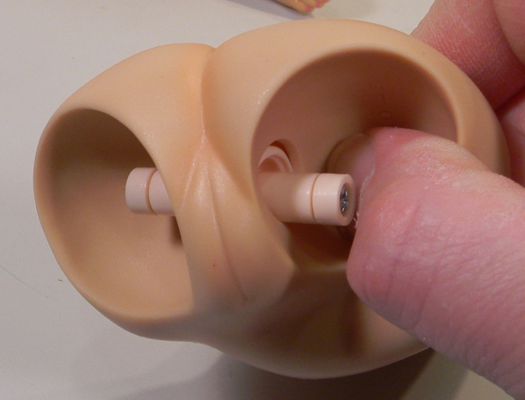
At a certain point the hip joint will start bumping into the inside of the leg recesses. Maneuver one of the hip joint pegs into the hole in the leg recess. With one hand push the spine into the abdomen and with the other pull the butt cheek as needed to get that first peg in the hole.
It's about at this point you may be tempted to get out a pair of pliers to grab the hip joint or pull on the vinyl. DON"T DO IT! It is all together too easy to crush one of the pegs on a joint or leave tool marks on the vinyl. Just keep tugging with your fingers.
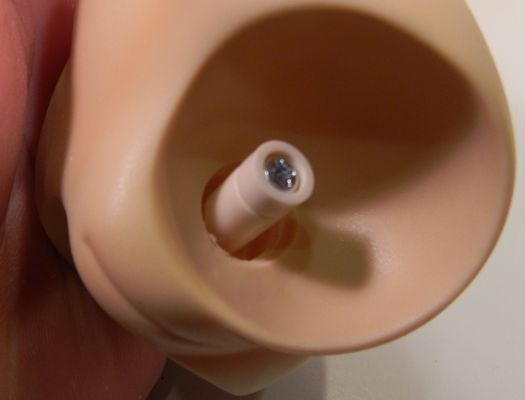
Once you have one of them in, keep pushing the spine down and continue squeezing and stretching the abdomen vinyl till you can get the second peg out of the second hole. The vinyl is pretty robust so don’t worry about tearing it.
With the hip joint in place, you can see how close the hole in the vinyl is to the size of the groove on the hip joint. When replacing the legs you’ll be glad you took the time to enlarge these holes.
4) Reassembling the upper torso with the abdomen.
Slide the top peg of the spine into the large hole in the shoulder joint part.
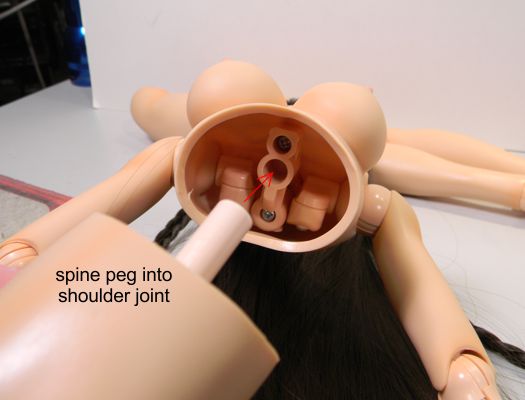
You will need to tuck the top of the abdomen vinyl inside of the bust vinyl while pushing the two parts together.
5) Replace the legs.
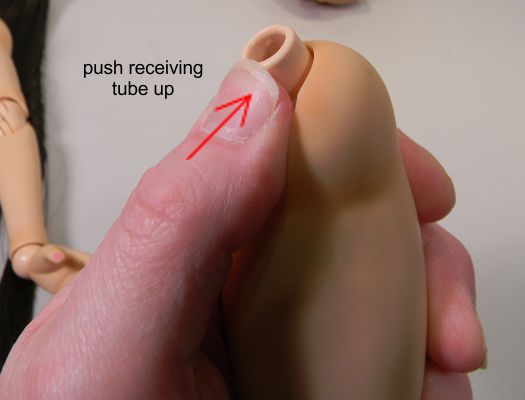
With the hip joint pegs protruding from the holes in the abdomen vinyl you're ready to replace the legs. Rotate hip joint receiver on the top of the leg so it is pointing up.
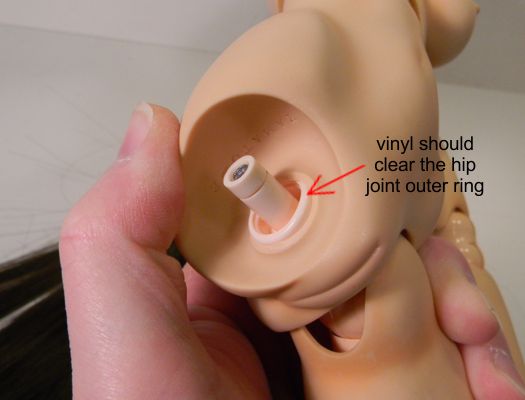
It's easier to reattach the leg by bringing the leg in perpendicular to the spine than with the leg in the "down" position. Working with the leg more perpendicular promotes attaching the leg with less of an angle between the two parts. Grasp the abdomen vinyl between the leg recesses till you can feel the center of the hip joint (like you did during disassembly). Bring the leg's hip joint in to the hip joint peg as straight as possible. Make sure the abdomen vinyl is clear of the peg and the little trough around it.
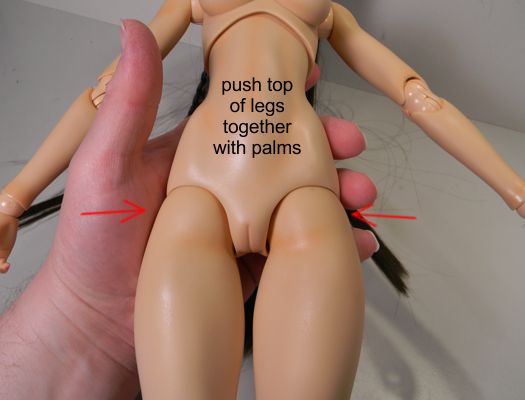
Once the two parts are engaged, you can rotate the leg down to its normal position. Repeat this process with the other leg. With the legs in place and in the normal position (and you've made sure the abdomen vinyl isn't in between the peg and hole), push the two leg tops (at the hip joint) together firmly till they are in place.
And that's it. When reassembled the legs should fit snugly in the abdomen recesses with out much of a gap. They should also move easily, but not be able to swing freely like a pendulum. If this is the case, remove the loose leg and check for stray or crushed vinyl on the edge of the hole. Trim a bit if needed.