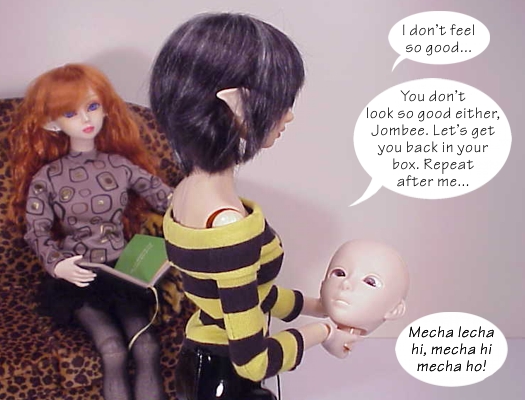
Welcome to the New Improved Obitsu Neck Piece.
This style neck piece comes with the 55cm boy body and the new 50cm girl body. By this time, it may come with the 60cm and 47cm bodies. If you’ve tried to put a head on one of these, you know they are a blessing and a curse. Once a head is properly seated on the NNP (new neck piece), it is very secure and will have an increased range of motion over the ONP (old neck piece). The NNP also doesn’t protrude into the head as far as the ONP. During extreme head angles the ONP can come in contact with protruding eye stalks, thus knocking eyeballs out of whack. But for all its advantages, the NNP is more difficult to seat properly, which is very frustrating.
A Word of CAUTION…
Seating a head on the new neck piece can require a lot more handling of the head than with the old neck piece. Great caution should be used if working with a finished face-up. I recommend removing the entire head and neck piece as one if the head must be removed. It is far easier to insert the neck piece into the body, than to put a head on the new neck piece. Ideally, leave the head on the body and mask off the body while doing the face-up.
With the aid of one of my able-headed assistants, I will demonstrate what to look for and how to properly seat a head on the NNP.
 ]
]
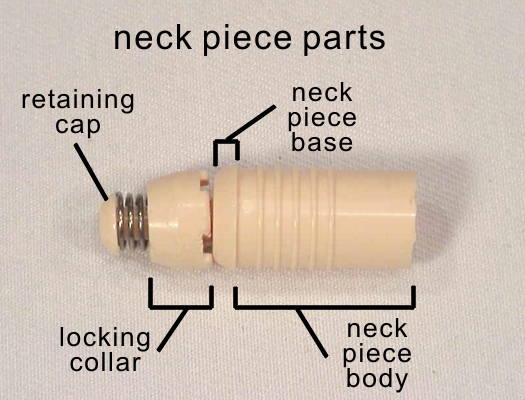
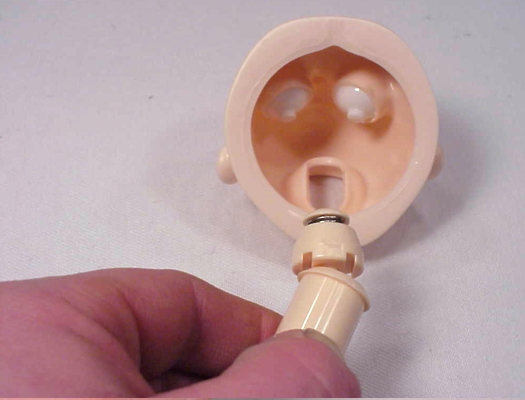
For the sake of clarity, this is the nomenclature I’ll be using through out this tutorial.
1) Neck Piece. The entire assembly as shown.
2) Retaining cap. Shapes vary, some are flat, some are curved.
3) Locking collar. Note that the locking collar has two grooves that are cut into one side. This is where the sides of the neck hole will be.
4) Neck piece base. The outside of the head rests on top of this section.
5) Neck piece body. Lengths vary, this part will be longer on the 47/55/60cm bodies than the 50cm.
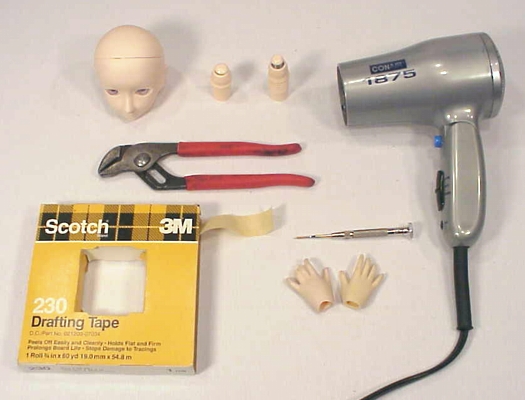
These are the tools needed for this procedure:
1) The head and new neck piece.
2) Your trusty hair drier. No vinyl owner can properly frankenstein their vinyl without one.
3) A pair of medium sized channel lock pliers. 6” to 8” jaws should be small enough to fit inside your new dollie head, yet big enough to open over the top of the NNP. These style pliers work better than slip joint or needle nose pliers because the jaws can be adjusted to remain parallel when gripping the locking collar and the offset angle of the jaws can get inside the head easier.
4) Some masking tape.
5) A small flat blade screw driver.
6) A second pair of hands. This procedure can be accomplished without help but save yourself the frustration. Get someone to help you.

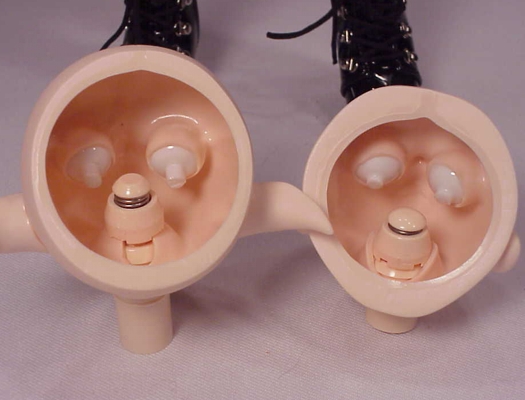
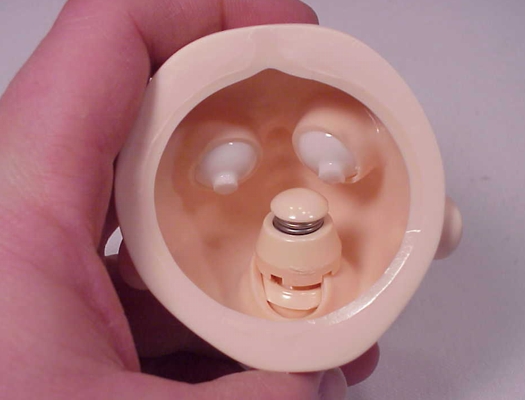
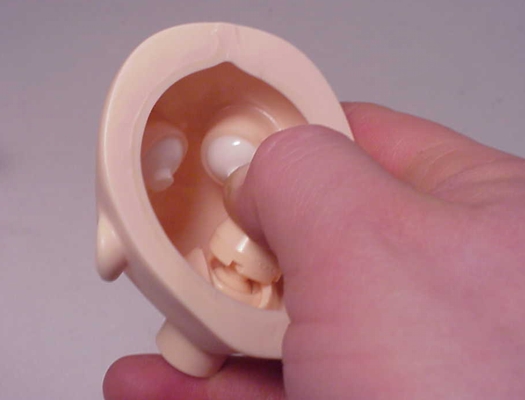
Here you can see the NNP inside the head. The one on the left is completely attached, while the one on the right is not. You can see how the vinyl edges of the neck hole of the head are spread around the locking collar and not underneath it. This is what happens when you just push the head on the neck piece. To be properly and completely attached, the sides of the neck hole must be between the locking collar and the neck piece base as in the one on the left.

If the head has been seated on the NNP like the one on the right above, remove the head from the NNP. With the hair dryer, heat the neck hole area and push the sides of the neck hole together so they once again form a proper, undeformed slot. Allow the head to cool in the correct position. This step could take a little while depending on how long the head has been on incompletely.
While the head is cooling, prep the pliers by placing a piece of the masking tape or two across the jaw’s gripping area. This will help keep the pliers from scaring the locking collar, but will increase the amount of force needed to grip the locking collar. If you are not concerned about the cosmetics of the neck piece (this part is inside the head all the time) you may omit the tape. (I have.)
Pull out and tilt the retaining cap till one of the grooves catch the side of the neck piece base. Align the grooves in the locking collar with the sides of the neck hole.
Push the NNP into the neck hole till the vinyl rests on the neck piece base. Be careful not to push the neck piece base into the head. Work the open side of the locking collar over the side of the neck hole. The edge of the neck hole should align in the groove in the locking collar.
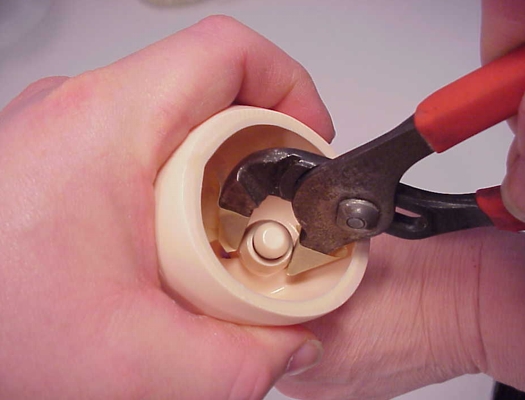
Have your second pair of hands grasp the neck piece body and the channel lock pliers. Position the pliers on the narrow flat spot (not the sloping part) of the locking collar and gently, but firmly pull up away from the neck, raising the other side of the locking collar. Now squeeze the neck hole under the locking collar. Once there, release the locking collar.
If the edge of the neck hole doesn’t quite reach the groove in the locking collar, gently work it in with the screw driver. Keep pressure on the first side so it doesn’t slip out.
If you don’t have those second pair of hands, alternately you can seat the locking collar by yourself by pushing on the retainer cap to open the unseated side. Then squeeze the neck hole closed by pushing from the outside and/or working the neck hole side under the locking collar with your screwdriver. This method requires a bit more handling, which can be detrimental to delicate face-ups.
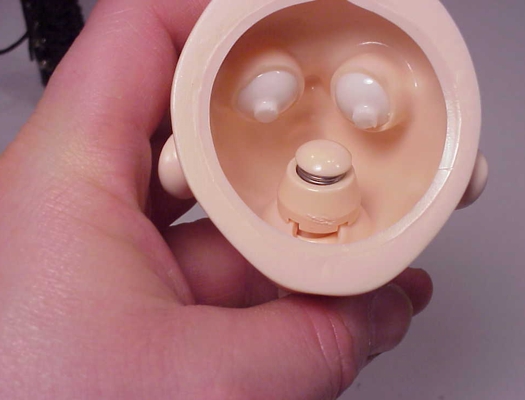
Now your head/neck piece should look like this. Congratulations, you’ve successfully attached the neck piece to the head. Now just push the neck piece body into the neck and on to the neck peg inside the chest.